Connect With WordPress Website
Joost
Last Update il y a 4 ans
To connect with yours, or your clients websites, you will need to install our free plugin - https://wordpress.org/plugins/scribable/
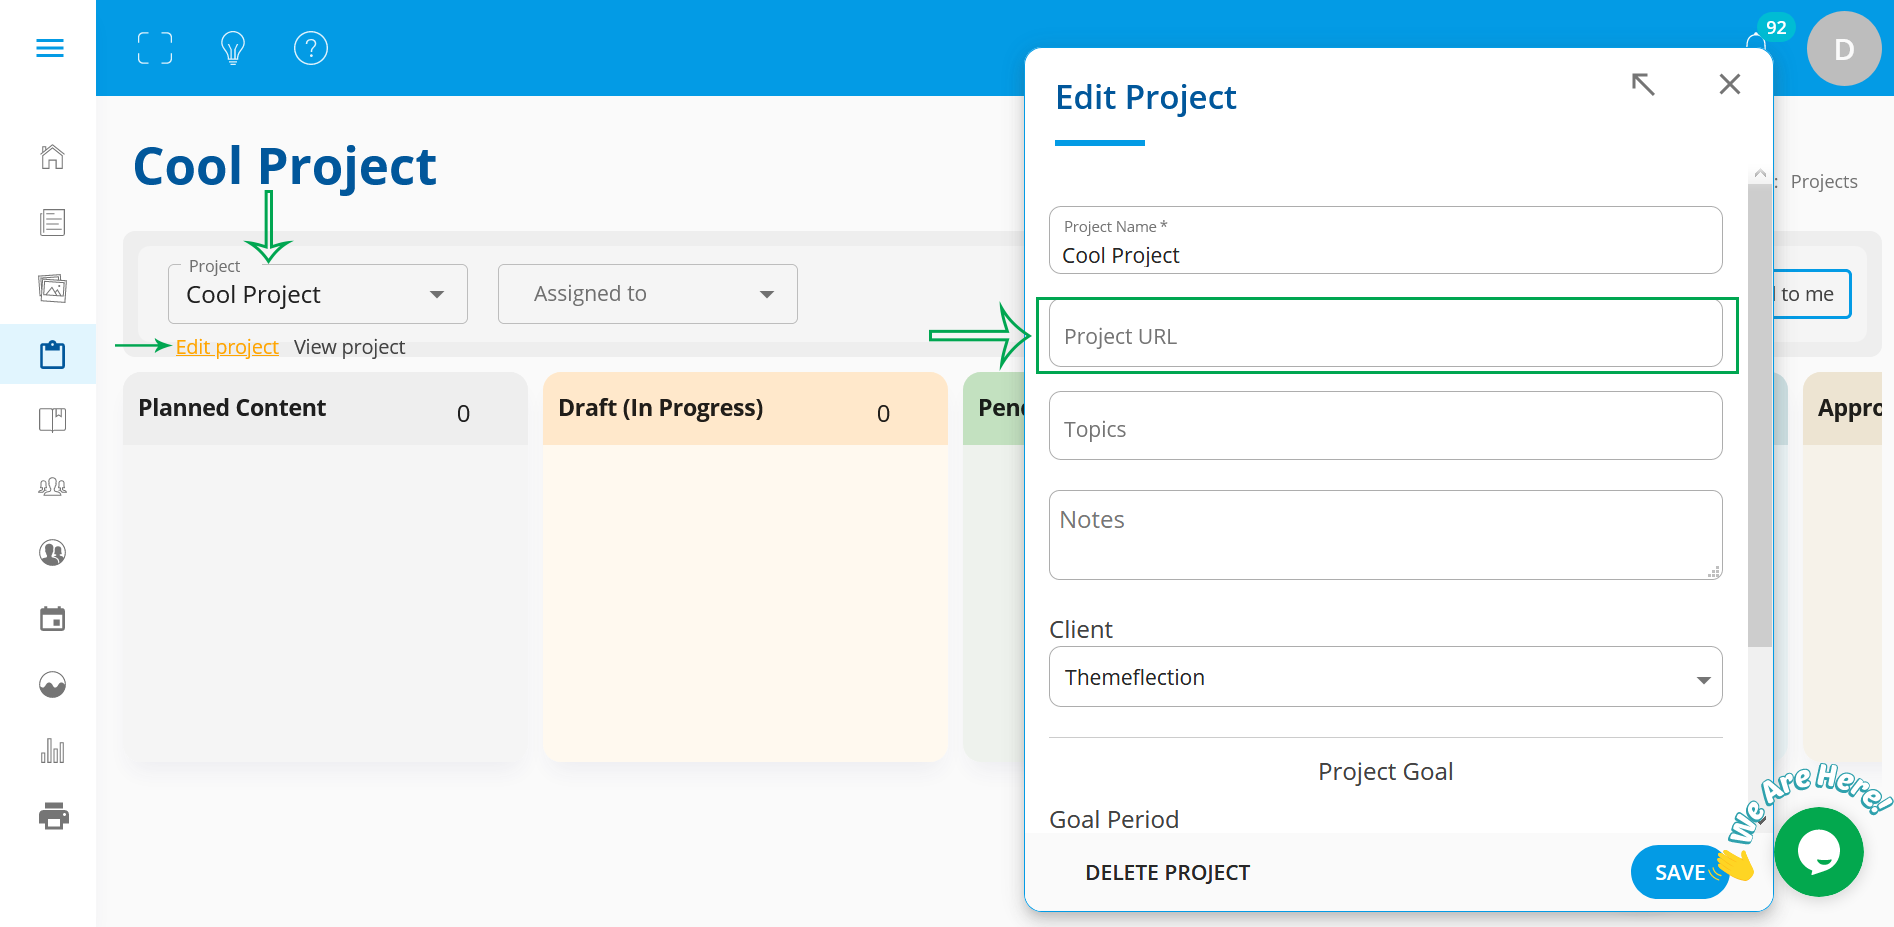
The WordPress website URL that you want to connect to, should be added as the project url. Before you try to connect, make sure you have url added:

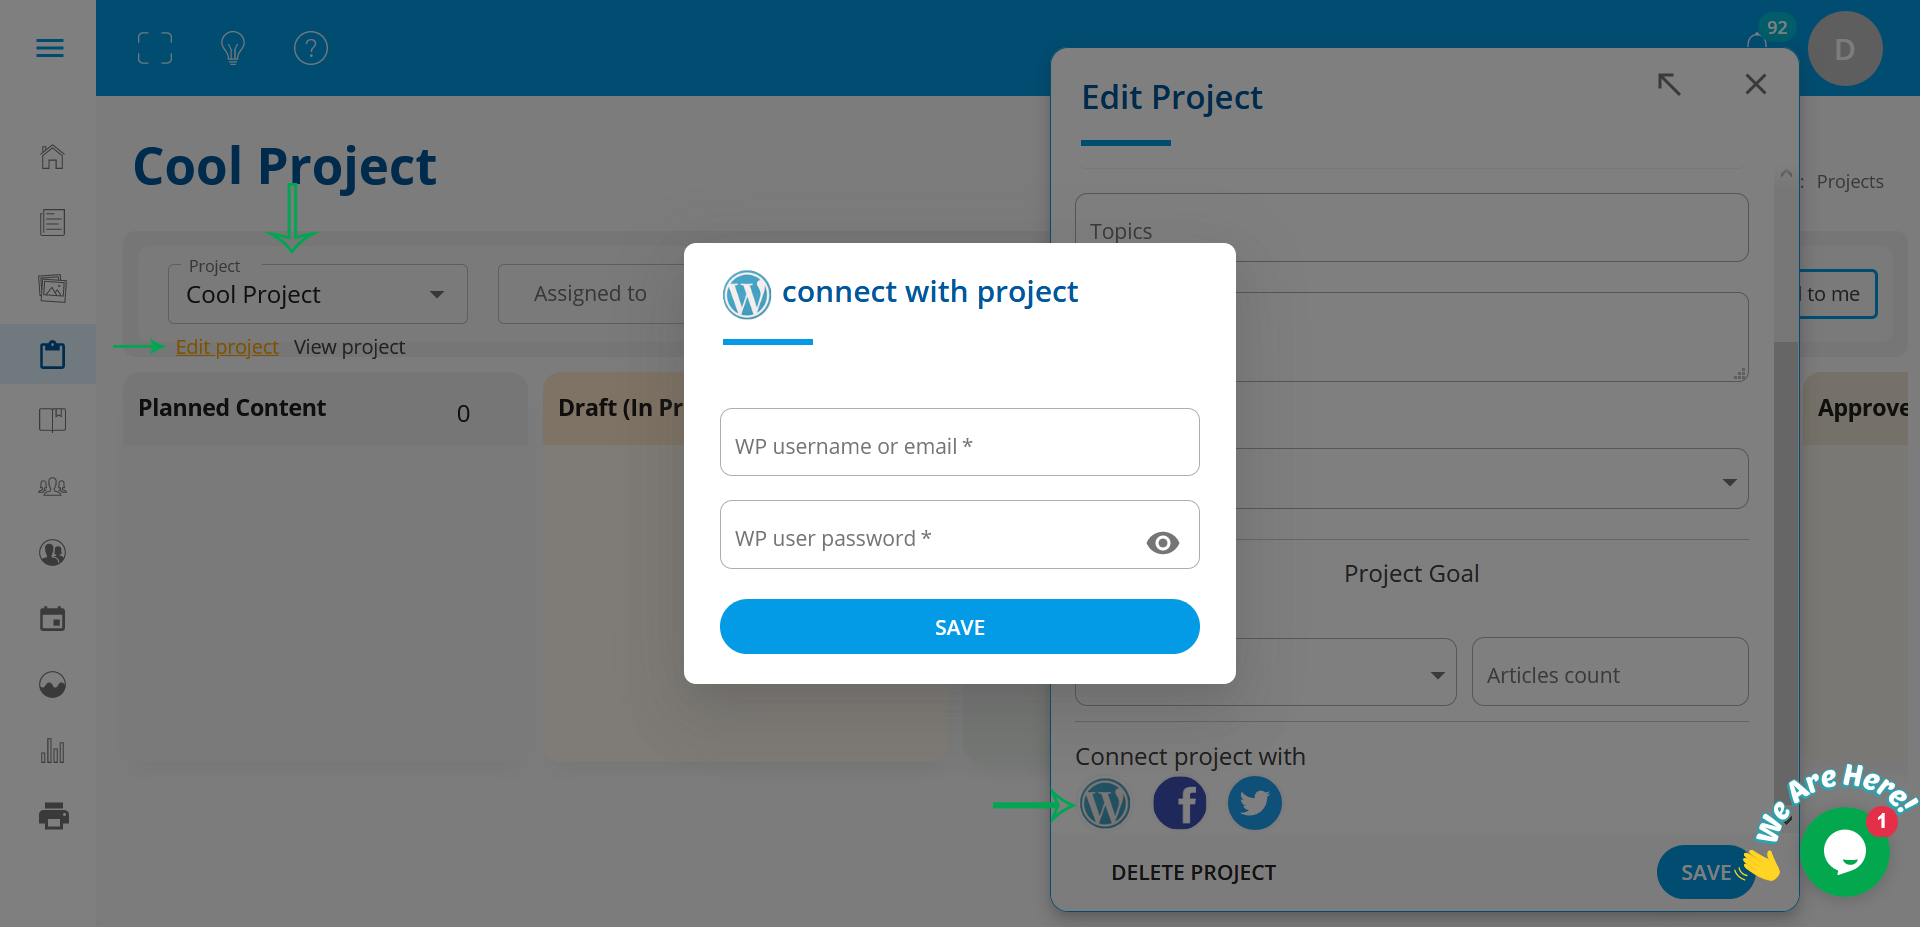
After downloading the plugin mentioned above and manually installing on the websites you want to connect with, head over to the Scribable dashboard and go to Projects page. Then under the edit project link, you can select WordPress integration:

Enter your website user's username/email and password to connect.
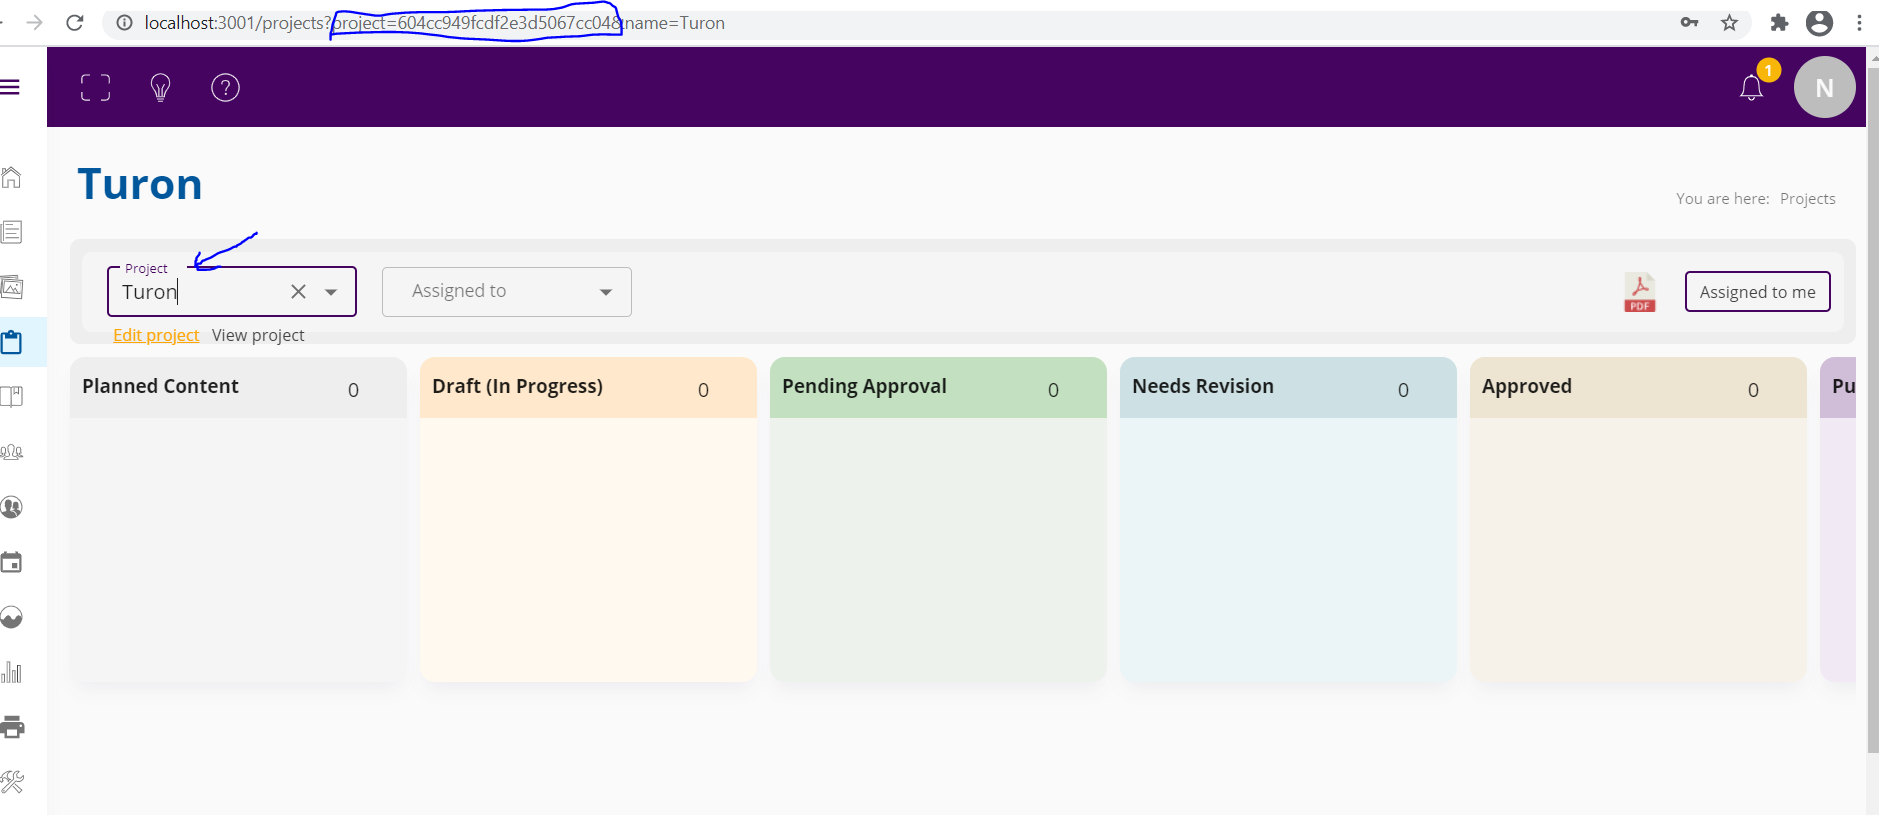
Then you will need to get that project id, you can find it in url:

Copy the project id, string after project= . You will use this id to paste into encryption field key in the Scribable WordPress plugin. You can find it under WordPress admin menu Settings->Scribable.
Security Notice: Once you enter the credentials for the first time and save them, they will be securely saved on the server, and will not be displayed, or passed through the website any more. They will be sent as encrypted from server to server without being exposed on the website. If you need to change credentials, you will need to create a new one overwriting the old one.
Getting Error: "Sorry, you are not allowed to create posts" When Trying To Publish Post
This can happen depending on the server and environment your WordPress is hosted on. What you should do is edit .htaccess file to fix auth being striped by server:
https://github.com/WordPress/application-passwords/wiki/Basic-Authorization-Header----Missing
To edit .htacess file you can use this plugin :
https://wordpress.org/plugins/wp-htaccess-editor/
If you are hosting your WordPress instance in docker or cloud with bitnami, you can do the following:
Edit .htaccess file as explained in the link above :
- Add a new line under RewriteEngine On and insert RewriteRule .* - [E=REMOTE_USER:%{HTTP:Authorization}] save and exit
- Edit /opt/bitnami/apps/wordpress/conf/httpd-app.conf add a new line after RewriteEngine On
In the new line insert: RewriteRule .* - [E=HTTP_AUTHORIZATION:%{HTTP:Authorization}] save and exit
- Restart Apache: sudo /opt/bitnami/ctlscript.sh restart apache
You can read about the issue here - https://wordpress.stackexchange.com/questions/303479/authentication-issue-with-rest-api-rest-cannot-create/310898#310898

